Showing posts with label cosplay. Show all posts

Tuesday, May 3, 2011

I can has: Atashi Plushie!

Hello! Its been a while since my last post. After doing the persocom ears post, I intended to follow it up with another Chobits-related project. Unfortunately, things got pretty busy at work so I had to postpone it for a few weeks.

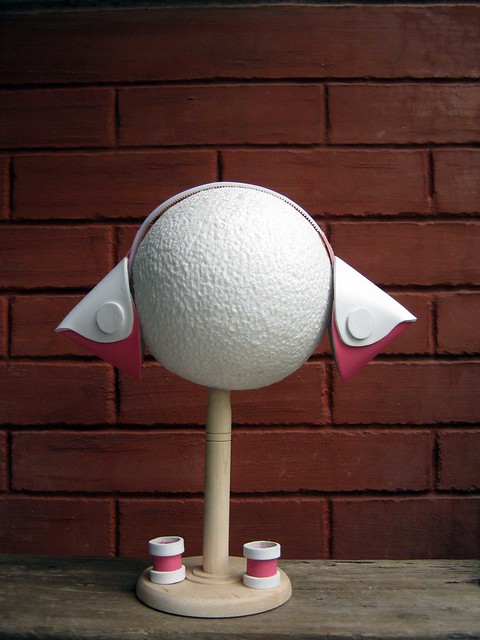
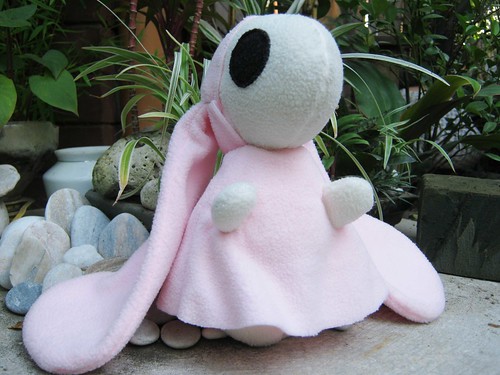
Anyway, here's another plushie I made for my Chii cosplay - Atashi!


Reference picture:

photo from cosplayisland.co.uk

If you're not familiar with Chobits, Atashi is the main character in the book A City With No People (read more about Atashi here). Chii loved the book series, so I figured she would like to have an Atashi plushie for herself. 

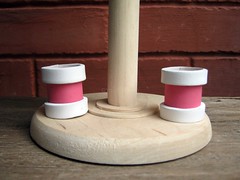
For this project, I used light skin tone, black, pink fleece and a small amount of polyfill. One thing I really like about using fleece is that it doesn't fray - meaning I don't have to hem it. You can see above that Atashi's skirt is not hemmed.

I will be making Atashi's partner, Anata, soon when I have time. For now, Atashi enjoys the company of 10 other plushies on top of my bed. XD


Want to have this plushie? Just leave a message here or send me an email at madz.nievera@gmail.com for inquiries.

Thanks for reading!

Sunday, April 17, 2011

I can has: Persocom Ears!

If you're familiar with Chobits,  you'll know what persocom ears are. If you don't, go here.

I finally made myself a decent pair of persocom ears! XD For this project, I used a small amount of rubber sheet, spray paint (in white and rose pink), greco glue, and a white headband.


I read a few tutorials online on how to make the ears, then modified some details. The ears turned out to be slightly pointy compared to the original one. Plus, I should have used a lighter shade of pink (will get a can soon!).


The hair clip/tube things are simple tubes. They were pretty simple to make: just make a 1 in. tube with 3/4 in. diameter, then 1/3 in rings with slightly wider diameter for the white part.


In case you're curious about how I attach the hair clip/tube things on my wig, I simply 'thread' my wig into the clip/tube using a piece of hair elastic (just like how you use a needle threader), pull up the clip/tube, tie your wig on the spot where you want the hair clip/tube to stay using one or two elastics (just make sure that the elastics will fit inside the hair clip/tube), then pull back the clips/tubes. Make sure that the elastics are well hidden inside the tubes.


Overall, I'm pretty satisfied with my work. It still needs a few tweaks, nothing major. :D


Just for reference, here are my old (crappy) persocom ears.  They're faaaaaar from good (made them without using any tutorials), but they still did the job years ago. I still keep them for memories. :D


Thanks for reading!

Tuesday, March 8, 2011

I can has: Hecate's Staff!

Months ago, my friend Sayou asked me to cosplay Hecate for a supposed Shakugan no Shana group. Excited to have a new costume - and for the chance to use my blue wig and to make props again - I said yes. So I dug out my stock rubber sheet, looked for some decent reference pictures, and made Hecate's staff.

Here's Hecate with her staff:


And here's my version of the staff:

See my mistakes there, there, and there? LOL

There were different versions of the staff. I got confused between the staff's original designs and fanart so I opted for the slightly easier design. The entire staff head was made out of rubber sheets, a meter of wire, and tons of glue. Like my Sakura Star Staff, this is removable from the staff for easy transport.

I learned a few things while making this staff. One, Pearl Gold spray paint looks better than Duchess Gold. I like Pearl Gold better because its about two shades lighter, and looks better on photos. I used to have a can of Pearl Gold which I used for my Princess Emeraude chest plate. When I went out to buy another can for the staff, they were out of stock so I had to settle for Duchess Gold. Mental Note: get a can of Pearl Gold ASAP.

Two: Get a grip with the glue! I use Greco glue for all my rubber sheet projects - its perfect! For this project, I overused the glue a bit, hence the shiny drips all over the staff head. 

Clickie!

Friday, February 4, 2011

I can has: Card Captor Sakura's Star Staff

When I first cosplayed Sakura from Card Captor Sakura, I only borrowed a staff because I didn't have time to make one. Months later, I had the urge to make a staff for myself, so I picked up some scrap rubber sheet (remnants of some other props project I made months ago), bought a new can of spray paint, bought gems, and looked for the perfect star tutorial online for the staff head.

Finding a material for the star was difficult. Most online tutorials only cater to stars made out of paper, and we all know that paper won't stand spray paint, plus they'll get destroyed easily. Paper mache is another option, but I don't have time to do that.

Finally, after a tiring day from work, I dropped by the department store and there was a perfect star with the perfect size in the Christmas ornament bin! Ha! XD

Two nights later, I finally have my own star staff:


Staff Head.

The wing part was only temporary because I ran out of white paint to cover the rubber sheet wings. The red gem was bought from Divisoria.


Here's the staff in full. I think its about 2/5 ft long, including the staff head. I still need to update the bottom part, which needs a red gem as well.

The head and bottom of the staff are detachable, which makes it easier for me to carry it while travelling.


If you're interested in having a Star Staff made, I would be more than happy to make one for you! I think I can still make two more, since I still have two extra stars at home. Just leave a message here. :D

Thanks for reading!

Saturday, January 8, 2011

Hello World!

Hello! Welcome to DIY Lunacy! This will be my little corner here in Blogspot for all my sewing and D.I.Y projects.

I've been making small accessories and trinkets for a few years now. It started when I was browsing online lolita shops back in college - I wanted to buy a lot of their stuff but my poor wallet cannot buy any of those pretty accessories. So I decided to test my creativity. I scoured for easy online tutorials, picked up a yards of lace and ribbons, and made myself a lolita headpiece.

black and red lolita headpiece

And another,

black and white lolita headpiece

then a choker.

lace choker with locket

A lot of my friends liked my work, some even encouraged me to sell them online (I tried, and failed though. haha).

Back then, I was starting to get into cosplaying as well - a pretty pricey hobby for a college student with a meager allowance. With a bit of creativity and keen eye on detail, I started to play with other materials and ended up making a chest plate and crown for my Princess Emeraude costume.

45521_421098210355_587275355_5272174_3355711_n

Right now, I'm mostly making plushies (yes, plushies!) which I will be sharing to you guys very soon! So stay tuned, and thank you for visiting DIY Lunacy!