Friday, April 1, 2011

Stuff from the Past: Ruffle Necklaces

Months ago, my friend Liz of Project Vanity commissioned me to make a set of ruffle necklaces for their shop Ukay Manila. Someone e-mailed me about this set, so I figured I should do a post on them here.


I can only describe the A Subtle Romance set with three words: elegant, romantic, and feminine. For this project, I used heavy brass chains, high quality silk chiffon (if I remember it correctly), lace, and handmade felt flowers with varying button details.


Its quite tedious to work with chiffon. For a necklace like this, the chiffon should be cut to the fiber in order to achieve clean lines and to avoid too much fraying. I also used small amounts of fabric glue to secure the corners of the chiffon.


The felt flower detail was sewn by hand. I didn't use fabric glue since the felt would just absorb all the glue. I can't tell you how tedious it is to assemble each flower. If I make one mistake, I'll have to start all over again! Haha. /haggard/


I was very satisfied with how the pieces turned out and I won't mind making a few more again some time. Would you be interested in having one of these?


Thanks for reading!

(photos from here)


Tuesday, March 22, 2011

I've been Knitting (and Crocheting)!

Whenever I want to learn a new craft, I usually just research on the matter and try to self-study. This is how I learned how to sew and make props. But there's some that I can't really learn to do - knitting and crocheting. While I did 'learn' how to knit back in grade school, I never got the hang of it. My stitches are always too tight and I can't understand patterns. Knitting, meanwhile, has always fascinated me. Whenever I see someone on TV knitting, I'd say "WTF how did she make that scarf with two sticks?!"

Last PCC (Philippine Cosplay Convention), I met up with a fellow crafter Clair from CraftyCat. She patiently taught me basic crocheting and knitting over ice cream while chatting about random stuff about making and selling handmade stuff. It was fun meeting a fellow crafter!

While I initially wanted to learn crocheting so I can make amigurumis, I ended up getting a bit addicted on knitting. Maybe because they're easier to carry around - I knit on my way to work. Haha. :D Anyway, see my practice pieces after the jump!

Tuesday, March 8, 2011

I can has: Hecate's Staff!

Months ago, my friend Sayou asked me to cosplay Hecate for a supposed Shakugan no Shana group. Excited to have a new costume - and for the chance to use my blue wig and to make props again - I said yes. So I dug out my stock rubber sheet, looked for some decent reference pictures, and made Hecate's staff.

Here's Hecate with her staff:


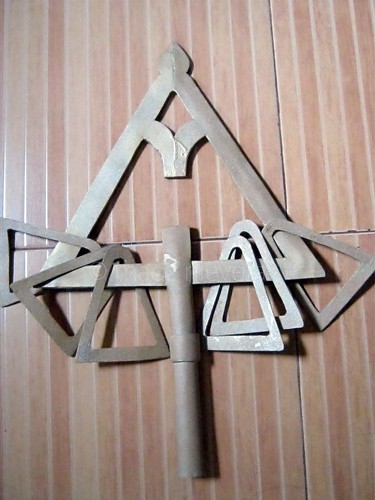
And here's my version of the staff:

See my mistakes there, there, and there? LOL

There were different versions of the staff. I got confused between the staff's original designs and fanart so I opted for the slightly easier design. The entire staff head was made out of rubber sheets, a meter of wire, and tons of glue. Like my Sakura Star Staff, this is removable from the staff for easy transport.

I learned a few things while making this staff. One, Pearl Gold spray paint looks better than Duchess Gold. I like Pearl Gold better because its about two shades lighter, and looks better on photos. I used to have a can of Pearl Gold which I used for my Princess Emeraude chest plate. When I went out to buy another can for the staff, they were out of stock so I had to settle for Duchess Gold. Mental Note: get a can of Pearl Gold ASAP.

Two: Get a grip with the glue! I use Greco glue for all my rubber sheet projects - its perfect! For this project, I overused the glue a bit, hence the shiny drips all over the staff head. 

Clickie!

Monday, February 21, 2011

The Chibis!

Earlier, I posted a WIP photo of my latest plush project. They were naked, lol. But right before Valentine's day, I was able to make them temporary clothes so they can join me and my boyfriend on our Tagaytay trip.


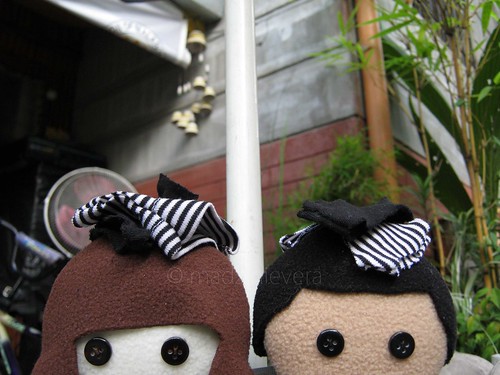
The Chibis enjoying the view


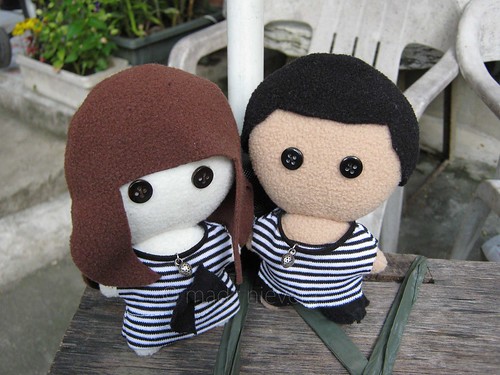
Their first set of clothes were made of fleece. They're cute, but my Mom suggested that they's be cuter if they wore 'realistic' clothes. So a few days after Valentine's, I dug out a few cut-up shirts, and made them these:

Oooh, real clothes! Lets try them on.


Tada~


I got the shirts I cut up from a thrift shop somewhere in Monumento (they were only 20 pesos each, haha). The doll's necklaces were made of  a small piece of leather strip and a strawberry pendant.

I'm currently working on another one for my Mom, since her officemates are bugging her for a sample piece. I'll probable make a replica of these two too, since my boyfriend wanted to take both dolls home, haha. I was planning to give him just one but, oh well.


Thanks for reading! 

Tuesday, February 15, 2011

WIP: Chibi Plushies

Just a quick update before I go back to my work station. :)

I usually work on random things in between commissioned projects, just to keep my mind clear (and sane). Most of the time I need distractions to be able to work properly. Weird, I know. So while planning out how to make hair for plushies like Jack Frost, I decided to work on a totally different plush style: Chibi plushies!

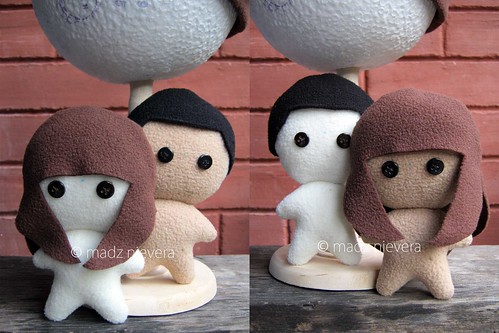
Naked plushies! UNSEEEE~ (quoted from my ex-officemate)

I made the pattern myself. The body was pretty simple to make. It only took me less than 30 minutes to cut and sew the head and body. The hair took a bit of time to develop though, took me a few trials to make the perfect pattern for boys and girls hair. In speaking of hair, they're WIGS! Yes, plushies with wigs! Since I regularly change my hair style (only minimal though), I wanted to be able to change their hairstyles easily without having to snip thread. As you see above, I simply interchanged their wigs to make a totally different characters.

I'm currently working on clothes for these chibis. I made them a set of clothes for Valentine's but its not yet perfect. Will post it soon.

Thanks for reading!

Saturday, February 12, 2011

DIY Project: Hat/Wig Stand

Whenever I make something new, I make it a point to always take pictures of them for reference and for product photos. After several hat projects, I noticed that something was missing - I need a proper stand for all the hats and plushies I make! Hah, I know, this is a given for any (future) sellers.

Since I'm almost mainly working on hats, I decided I should make my own hat stand first.


Say hello to my brand new DIY Hat/Wig stand! I simply bought a large styro ball from National Bookstore, then added the wood kitchen tissue holder as a stand. With this set up, I can easily put on my hats on the stand and take as much pictures as I want on any angle without having to adjust the hat after every shot. I can also easily adjust the stand's head size by simply replacing the styro ball with a larger/smaller one.

This stand is also very useful when styling or fixing wigs. I own several wigs for cosplay, and its quite difficult to comb them with one hand holding the wig and the other combing away. Just put the wig on this stand, pin it on the styro ball, and voila! you have two hands to work with! This also gives you a very good preview of how your wig will come out after styling it.

If you want to make one, I already mentioned that the ball came from National Bookstore. You see that my styro ball is a size 7, since my head's circumference is 24 inches. If your head is 22 inches (most people are on this size!), get the size 6. As for the wood kitchen tissue stand, I got mine at Japan Home Center for 88 pesos. A bit pricey but its very convenient to set up (just screw the rod on the base).

I also suggest to cover the styro ball with fabric to avoid stray styrofoam chips. Also, it'll look better. Im currently working on that. :D

I hope you find this post useful. Thank you for reading!


Friday, February 4, 2011

I can has: Card Captor Sakura's Star Staff

When I first cosplayed Sakura from Card Captor Sakura, I only borrowed a staff because I didn't have time to make one. Months later, I had the urge to make a staff for myself, so I picked up some scrap rubber sheet (remnants of some other props project I made months ago), bought a new can of spray paint, bought gems, and looked for the perfect star tutorial online for the staff head.

Finding a material for the star was difficult. Most online tutorials only cater to stars made out of paper, and we all know that paper won't stand spray paint, plus they'll get destroyed easily. Paper mache is another option, but I don't have time to do that.

Finally, after a tiring day from work, I dropped by the department store and there was a perfect star with the perfect size in the Christmas ornament bin! Ha! XD

Two nights later, I finally have my own star staff:


Staff Head.

The wing part was only temporary because I ran out of white paint to cover the rubber sheet wings. The red gem was bought from Divisoria.


Here's the staff in full. I think its about 2/5 ft long, including the staff head. I still need to update the bottom part, which needs a red gem as well.

The head and bottom of the staff are detachable, which makes it easier for me to carry it while travelling.


If you're interested in having a Star Staff made, I would be more than happy to make one for you! I think I can still make two more, since I still have two extra stars at home. Just leave a message here. :D

Thanks for reading!