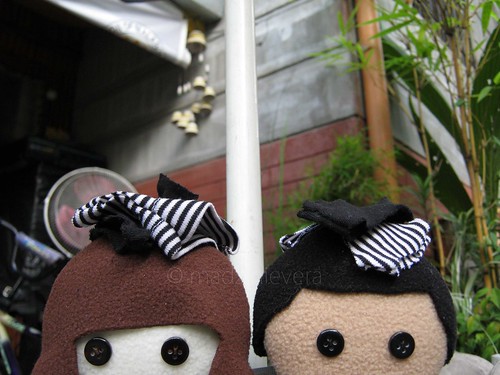
Sunday, July 3, 2011

I'm back! :D

Hello! Yes, I'm still alive. After months of hiatus, I finally decided that I should try blogging again.

Before going on hiatus, I was knitting like mad. Its really addicting. Until one day, I started feeling pain in my hands/wrists. I never had it checked, but I feared it might be a case of carpal tunnel syndrome. I wouldn't be surprised if I did have CTS for my hands were overworked typing all day at work and knitting during breaks. So I had to give up crafting for a while. Of course I can't give up work - work means money and money means I can support myself and buy stuff that I want. My hands are ok now, but I'm still holding back a bit from crafting.


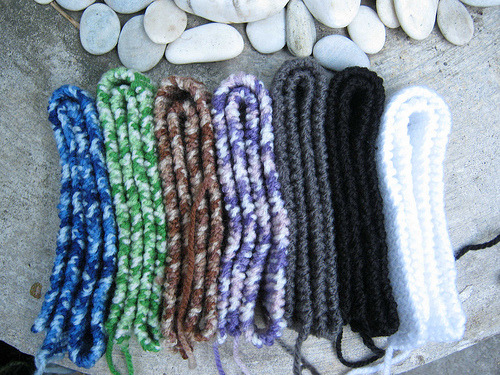
The last batch of BJD scarves I made a while back.


It doesn't help that my sewing machine, Maki, is not in good shape. I can't really elaborate on it but he has to be repaired first before I can make new stuff. Its frustrating - I've been trying to get my crafting mojo back but my sewing machine is not cooperating. Gah.


Ok, ok, I'll stop rambling now. I'm slowly getting back to crafting. I still have a list of things to make: a set of plushies for my bestfriend, a pajama set for my boyfriend's sister, a plushie for a friend and more! Sorry for the loooong wait guys! I'll do my best to make them soon. :D

***
Sunday, May 8, 2011

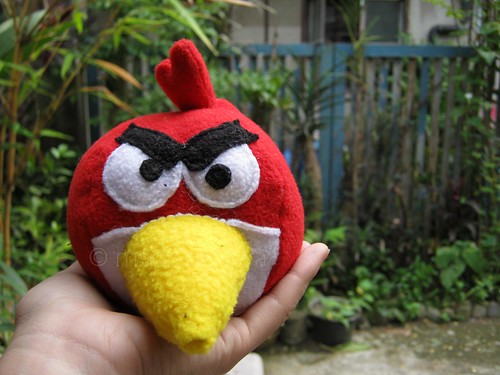
Plushies: Angry Birds

When I first played Angry Birds on my friend's Samsung Corby, my initial thought was they're cute had to have a  plushie version.

After googling a bit, I found a sewing blog with a tutorial on how to make Angry Birds characters!

Now I present you, Red:


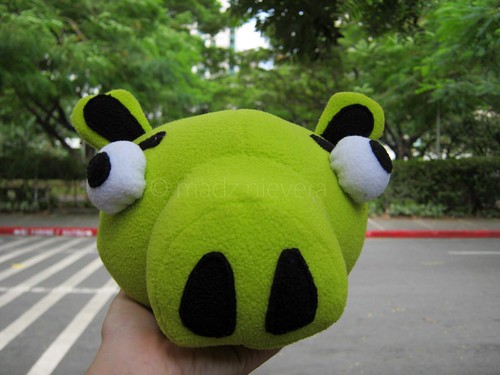
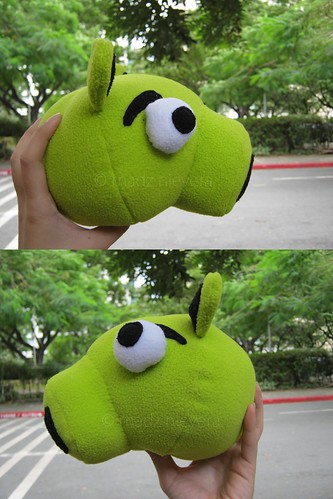
And Pig:


Red was my first plushie experiment using me sewing machine, so he doesn't look that good. As for the Pi, I'm pretty satisfied with my sewing, though if I were to make another one, I would modify his eyes and make them flat. The tutorial asked for his eyes to be googly - cute but not my thing.

I already have the patterns to make the other characters. I'll try to make them when I have time. :)


Thanks for reading!

Tuesday, May 3, 2011

I can has: Atashi Plushie!

Hello! Its been a while since my last post. After doing the persocom ears post, I intended to follow it up with another Chobits-related project. Unfortunately, things got pretty busy at work so I had to postpone it for a few weeks.

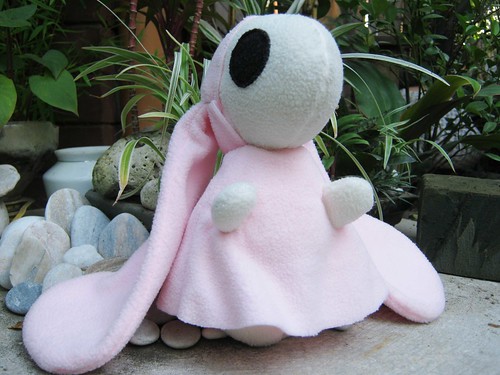
Anyway, here's another plushie I made for my Chii cosplay - Atashi!


Reference picture:

photo from cosplayisland.co.uk

If you're not familiar with Chobits, Atashi is the main character in the book A City With No People (read more about Atashi here). Chii loved the book series, so I figured she would like to have an Atashi plushie for herself. 

For this project, I used light skin tone, black, pink fleece and a small amount of polyfill. One thing I really like about using fleece is that it doesn't fray - meaning I don't have to hem it. You can see above that Atashi's skirt is not hemmed.

I will be making Atashi's partner, Anata, soon when I have time. For now, Atashi enjoys the company of 10 other plushies on top of my bed. XD


Want to have this plushie? Just leave a message here or send me an email at madz.nievera@gmail.com for inquiries.

Thanks for reading!

Sunday, April 17, 2011

I can has: Persocom Ears!

If you're familiar with Chobits,  you'll know what persocom ears are. If you don't, go here.

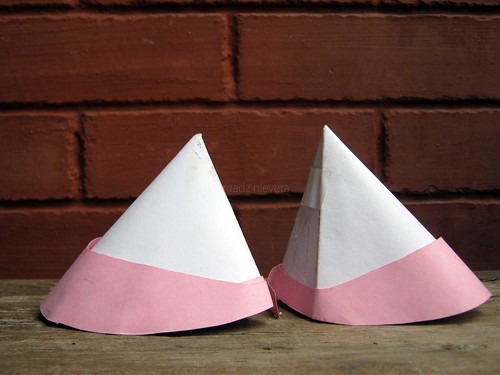
I finally made myself a decent pair of persocom ears! XD For this project, I used a small amount of rubber sheet, spray paint (in white and rose pink), greco glue, and a white headband.


I read a few tutorials online on how to make the ears, then modified some details. The ears turned out to be slightly pointy compared to the original one. Plus, I should have used a lighter shade of pink (will get a can soon!).


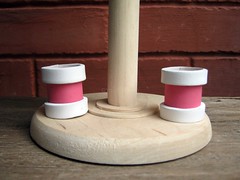
The hair clip/tube things are simple tubes. They were pretty simple to make: just make a 1 in. tube with 3/4 in. diameter, then 1/3 in rings with slightly wider diameter for the white part.


In case you're curious about how I attach the hair clip/tube things on my wig, I simply 'thread' my wig into the clip/tube using a piece of hair elastic (just like how you use a needle threader), pull up the clip/tube, tie your wig on the spot where you want the hair clip/tube to stay using one or two elastics (just make sure that the elastics will fit inside the hair clip/tube), then pull back the clips/tubes. Make sure that the elastics are well hidden inside the tubes.


Overall, I'm pretty satisfied with my work. It still needs a few tweaks, nothing major. :D


Just for reference, here are my old (crappy) persocom ears.  They're faaaaaar from good (made them without using any tutorials), but they still did the job years ago. I still keep them for memories. :D


Thanks for reading!

Friday, April 8, 2011

Japanese Thrift Shop Haul


Note: This was already posted on my Tumblr page. I got too excited to write about these that instead of just posting pictures, I ended up writing a short blog. XD

A year ago, my friend Sayou and I were browsing through a thrift shop when I spotted an authentic Japanese kimono! I instantly bought it, only to realize that it was a child's kimono. Since then, I promised myself that I will buy/make myself a kimono (in my size).

I did attempt to make one - but I never got to finish it. I still have the fabric though, and I'm planning to give it another shot this coming Holy Week (4 day vacation huzzah!). But I was able to find myself an authentic kimono in my size a few weeks ago. :D

My short Tumblr post starts here:


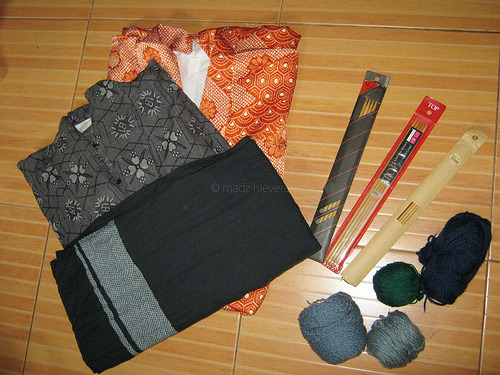
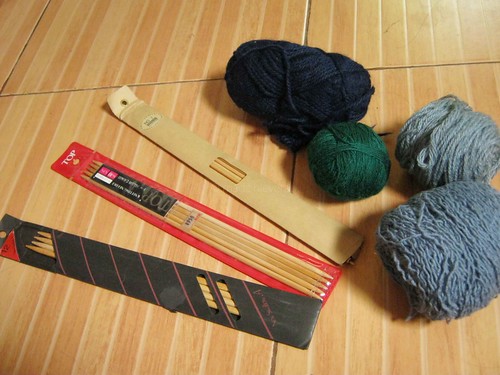
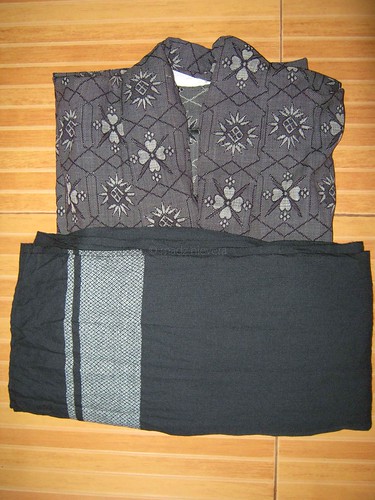
Japanese thrift shop haul from a few weeks ago. 2 kimonos, an obi, 3 sets of double pointed (?) knitting needles in 7, 10 and 12, and a few balls of yarn.


The knitting needles are in perfect condition, except for one size 12 needle that has a tiny bite mark on the tip. There was also a loose size 6 in the brown pack and a metal tube thing. Too bad I forgot to get the smaller knitting needle for the green yarn. The yarns are also good except for the dark blue one.


The shop didn’t have much choices on their kimonos. Most of them are heavily stained or have ugly prints/colors, so I settled for this gray one and a fire orange one. I still have to make/find a red obi for the orange.

All in all, I think it was a good haul! I’m going back in a few weeks to see if they have better kimonos. :D
Japanese thrift shop haul from a few weeks ago. 2 kimonos, an obi, 3 sets of double pointed (?) knitting needles in 7, 10 and 12, and a few balls of yarn.
The knitting needles are in perfect condition, except for one size 12 needle that has a tiny bite mark on the tip. There was also a loose size 6 in the brown pack and a metal tube thing. Too bad I forgot to get the smaller knitting needle for the green yarn. The yarns are also good except for the dark blue one.
The shop didn’t have much choices on their kimonos. Most of them are heavily stained or have ugly prints/colors, so I settled for this gray one and a fire orange one. I still have to make/find a red obi for the orange.
All in all, I think it was a good haul! I’m going back in a few weeks to see if they have better kimonos. :D

End of Tumblr post.


As I said, it was a very good find! You can't find kimonos everyday, and knitting needles are very expensive. And everything was dirt cheap too. I'm planning to use the gray and black set for a shoot sometime soon *pokes Sayou*.

Thanks for reading!

Friday, April 1, 2011

Stuff from the Past: Ruffle Necklaces

Months ago, my friend Liz of Project Vanity commissioned me to make a set of ruffle necklaces for their shop Ukay Manila. Someone e-mailed me about this set, so I figured I should do a post on them here.


I can only describe the A Subtle Romance set with three words: elegant, romantic, and feminine. For this project, I used heavy brass chains, high quality silk chiffon (if I remember it correctly), lace, and handmade felt flowers with varying button details.


Its quite tedious to work with chiffon. For a necklace like this, the chiffon should be cut to the fiber in order to achieve clean lines and to avoid too much fraying. I also used small amounts of fabric glue to secure the corners of the chiffon.


The felt flower detail was sewn by hand. I didn't use fabric glue since the felt would just absorb all the glue. I can't tell you how tedious it is to assemble each flower. If I make one mistake, I'll have to start all over again! Haha. /haggard/


I was very satisfied with how the pieces turned out and I won't mind making a few more again some time. Would you be interested in having one of these?


Thanks for reading!

(photos from here)


Tuesday, March 22, 2011

I've been Knitting (and Crocheting)!

Whenever I want to learn a new craft, I usually just research on the matter and try to self-study. This is how I learned how to sew and make props. But there's some that I can't really learn to do - knitting and crocheting. While I did 'learn' how to knit back in grade school, I never got the hang of it. My stitches are always too tight and I can't understand patterns. Knitting, meanwhile, has always fascinated me. Whenever I see someone on TV knitting, I'd say "WTF how did she make that scarf with two sticks?!"

Last PCC (Philippine Cosplay Convention), I met up with a fellow crafter Clair from CraftyCat. She patiently taught me basic crocheting and knitting over ice cream while chatting about random stuff about making and selling handmade stuff. It was fun meeting a fellow crafter!

While I initially wanted to learn crocheting so I can make amigurumis, I ended up getting a bit addicted on knitting. Maybe because they're easier to carry around - I knit on my way to work. Haha. :D Anyway, see my practice pieces after the jump!

Tuesday, March 8, 2011

I can has: Hecate's Staff!

Months ago, my friend Sayou asked me to cosplay Hecate for a supposed Shakugan no Shana group. Excited to have a new costume - and for the chance to use my blue wig and to make props again - I said yes. So I dug out my stock rubber sheet, looked for some decent reference pictures, and made Hecate's staff.

Here's Hecate with her staff:


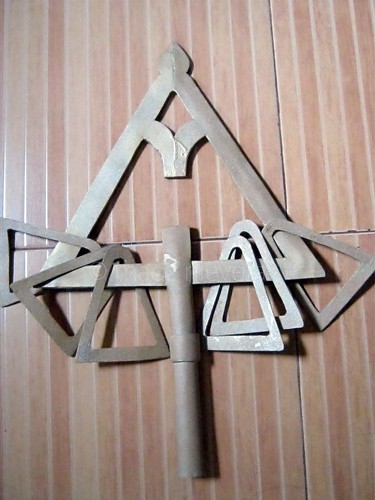
And here's my version of the staff:

See my mistakes there, there, and there? LOL

There were different versions of the staff. I got confused between the staff's original designs and fanart so I opted for the slightly easier design. The entire staff head was made out of rubber sheets, a meter of wire, and tons of glue. Like my Sakura Star Staff, this is removable from the staff for easy transport.

I learned a few things while making this staff. One, Pearl Gold spray paint looks better than Duchess Gold. I like Pearl Gold better because its about two shades lighter, and looks better on photos. I used to have a can of Pearl Gold which I used for my Princess Emeraude chest plate. When I went out to buy another can for the staff, they were out of stock so I had to settle for Duchess Gold. Mental Note: get a can of Pearl Gold ASAP.

Two: Get a grip with the glue! I use Greco glue for all my rubber sheet projects - its perfect! For this project, I overused the glue a bit, hence the shiny drips all over the staff head. 

Clickie!

Monday, February 21, 2011

The Chibis!

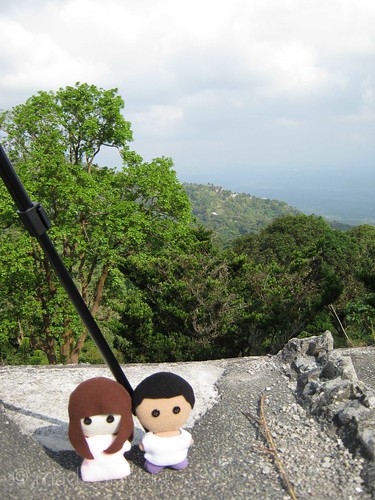
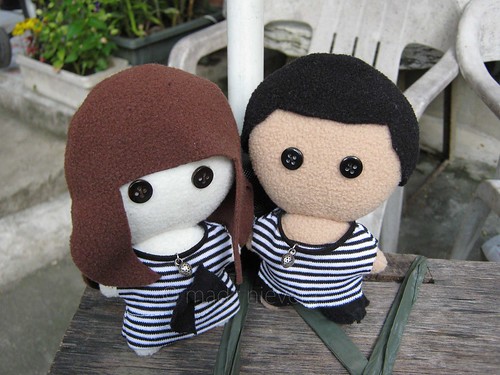
Earlier, I posted a WIP photo of my latest plush project. They were naked, lol. But right before Valentine's day, I was able to make them temporary clothes so they can join me and my boyfriend on our Tagaytay trip.


The Chibis enjoying the view


Their first set of clothes were made of fleece. They're cute, but my Mom suggested that they's be cuter if they wore 'realistic' clothes. So a few days after Valentine's, I dug out a few cut-up shirts, and made them these:

Oooh, real clothes! Lets try them on.


Tada~


I got the shirts I cut up from a thrift shop somewhere in Monumento (they were only 20 pesos each, haha). The doll's necklaces were made of  a small piece of leather strip and a strawberry pendant.

I'm currently working on another one for my Mom, since her officemates are bugging her for a sample piece. I'll probable make a replica of these two too, since my boyfriend wanted to take both dolls home, haha. I was planning to give him just one but, oh well.


Thanks for reading! 

Tuesday, February 15, 2011

WIP: Chibi Plushies

Just a quick update before I go back to my work station. :)

I usually work on random things in between commissioned projects, just to keep my mind clear (and sane). Most of the time I need distractions to be able to work properly. Weird, I know. So while planning out how to make hair for plushies like Jack Frost, I decided to work on a totally different plush style: Chibi plushies!

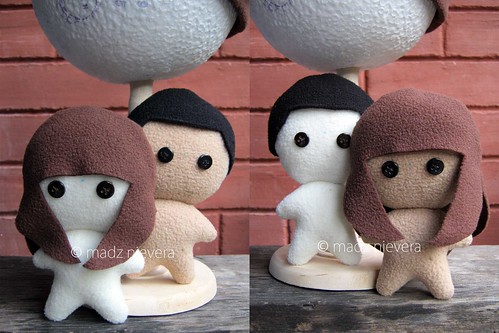
Naked plushies! UNSEEEE~ (quoted from my ex-officemate)

I made the pattern myself. The body was pretty simple to make. It only took me less than 30 minutes to cut and sew the head and body. The hair took a bit of time to develop though, took me a few trials to make the perfect pattern for boys and girls hair. In speaking of hair, they're WIGS! Yes, plushies with wigs! Since I regularly change my hair style (only minimal though), I wanted to be able to change their hairstyles easily without having to snip thread. As you see above, I simply interchanged their wigs to make a totally different characters.

I'm currently working on clothes for these chibis. I made them a set of clothes for Valentine's but its not yet perfect. Will post it soon.

Thanks for reading!

Saturday, February 12, 2011

DIY Project: Hat/Wig Stand

Whenever I make something new, I make it a point to always take pictures of them for reference and for product photos. After several hat projects, I noticed that something was missing - I need a proper stand for all the hats and plushies I make! Hah, I know, this is a given for any (future) sellers.

Since I'm almost mainly working on hats, I decided I should make my own hat stand first.


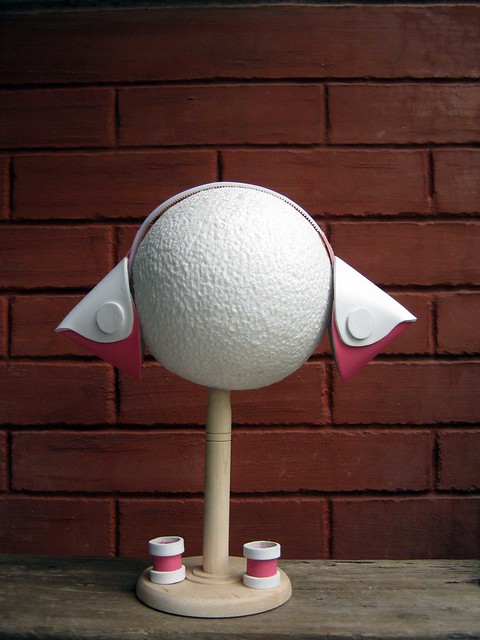
Say hello to my brand new DIY Hat/Wig stand! I simply bought a large styro ball from National Bookstore, then added the wood kitchen tissue holder as a stand. With this set up, I can easily put on my hats on the stand and take as much pictures as I want on any angle without having to adjust the hat after every shot. I can also easily adjust the stand's head size by simply replacing the styro ball with a larger/smaller one.

This stand is also very useful when styling or fixing wigs. I own several wigs for cosplay, and its quite difficult to comb them with one hand holding the wig and the other combing away. Just put the wig on this stand, pin it on the styro ball, and voila! you have two hands to work with! This also gives you a very good preview of how your wig will come out after styling it.

If you want to make one, I already mentioned that the ball came from National Bookstore. You see that my styro ball is a size 7, since my head's circumference is 24 inches. If your head is 22 inches (most people are on this size!), get the size 6. As for the wood kitchen tissue stand, I got mine at Japan Home Center for 88 pesos. A bit pricey but its very convenient to set up (just screw the rod on the base).

I also suggest to cover the styro ball with fabric to avoid stray styrofoam chips. Also, it'll look better. Im currently working on that. :D

I hope you find this post useful. Thank you for reading!


Friday, February 4, 2011

I can has: Card Captor Sakura's Star Staff

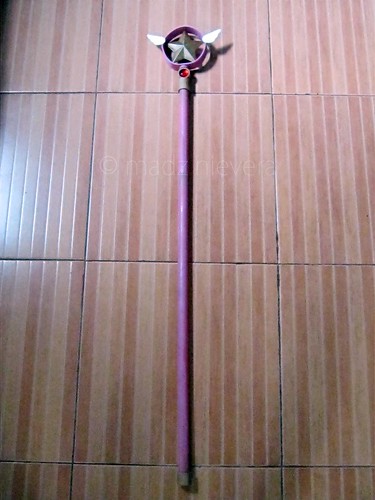
When I first cosplayed Sakura from Card Captor Sakura, I only borrowed a staff because I didn't have time to make one. Months later, I had the urge to make a staff for myself, so I picked up some scrap rubber sheet (remnants of some other props project I made months ago), bought a new can of spray paint, bought gems, and looked for the perfect star tutorial online for the staff head.

Finding a material for the star was difficult. Most online tutorials only cater to stars made out of paper, and we all know that paper won't stand spray paint, plus they'll get destroyed easily. Paper mache is another option, but I don't have time to do that.

Finally, after a tiring day from work, I dropped by the department store and there was a perfect star with the perfect size in the Christmas ornament bin! Ha! XD

Two nights later, I finally have my own star staff:


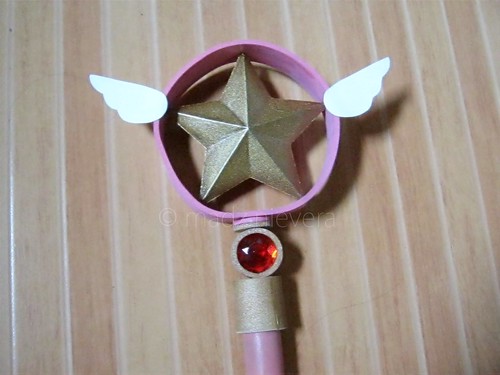
Staff Head.

The wing part was only temporary because I ran out of white paint to cover the rubber sheet wings. The red gem was bought from Divisoria.


Here's the staff in full. I think its about 2/5 ft long, including the staff head. I still need to update the bottom part, which needs a red gem as well.

The head and bottom of the staff are detachable, which makes it easier for me to carry it while travelling.


If you're interested in having a Star Staff made, I would be more than happy to make one for you! I think I can still make two more, since I still have two extra stars at home. Just leave a message here. :D

Thanks for reading!

Thursday, January 27, 2011

I can has: Cookie Hat!

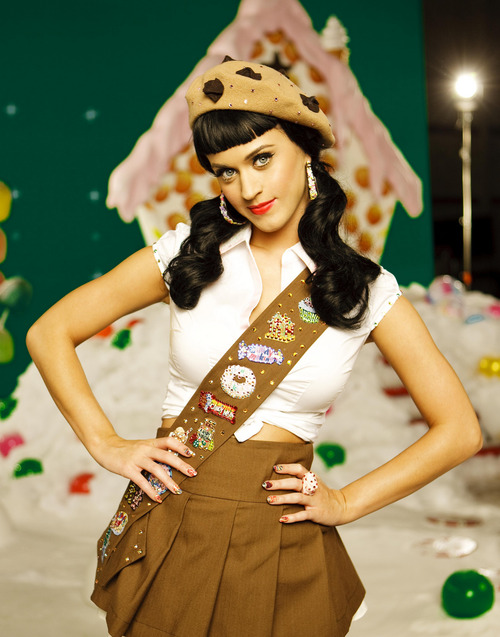
When I first saw Katy Perry's California Gurls video, one of the things that I wanted to have was her cookie hat. I forgot about it until months later, after finishing a commissioned hat, I had a bit of creative burst and decided to make a cookie hat for myself.

Here's Katy Perry in her super cute Girl Scout outfit:


From unicornology.tumblr.com


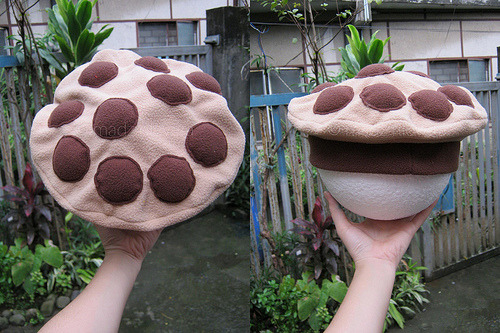
And here's my own version of the cookie hat:


I used my usual custom beret pattern (I was too lazy to find a different tutorial to make a hat that exactly looks like Katy's hat) and simply added the chocolate bits. I opted not to add sequins (for the sugar detail?) because I don't sequins in general.

My original idea was to have flat chocolate bits, but it looked too boring. So I stuffed some poly-fill in each chocolate bit and - tada! a very cute cookie hat. It also serves as my personal pseudo bubble wrap while working.

Most people thought its a mushroom hat though. OTL Some even thought its a turtle hat. Come on people, when you think about mushrooms, do you first imagine it as light brown with dark spots? Do turtles come in brown shells? Haha. I noticed though that those who first thought that this was a cookie hat were kids, while those who thought it was a mushroom hat were adults. Heh. :3

Maybe I should make myself a mushroom hat *evil planssss*.


If you're interested in buying this hat, please leave me a message! I would love to make one for you! Just leave a message. Thanks!

Saturday, January 22, 2011

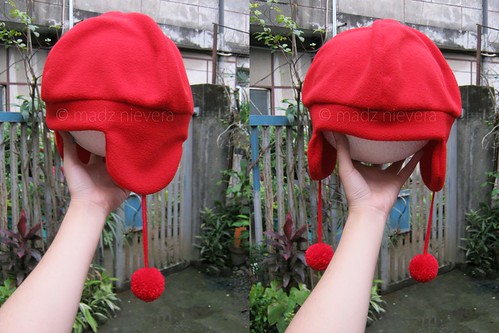
Commission: Fleece Hat with Ear Flaps

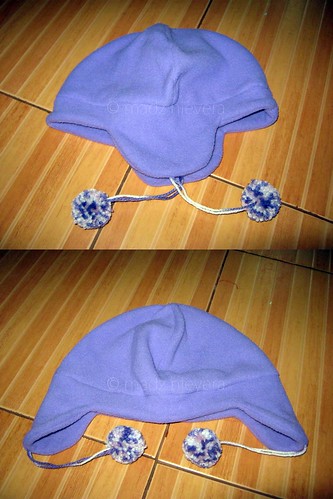
Hello! I recently finished two commissioned hats for my Mom's officemate. Here they are!


purple hat with ear flaps
Purple

red hat with ear flaps
Red

I'm not really sure how these are called - fleece beanies with ear flaps? Haha. I need to do my research. At least I was able to make them exactly as my client described.

I used the basic fleece hat pattern by clearkid (from deviantart), then modified the bottom part to accommodate the ear flaps (apparently, he/she already put up a tutorial for hats with ear flaps. I only discovered this after I made the purple hat). To make the yarn pom-poms, I used a tiny pompom maker device that looks like this:


large-pom-pom-maker.jpg (500×500)
Photo from shoponline2011.com

I got mine from a local anime convention for only 50 pesos! As for the type of yarn, I use the brand Red Heart since it produces the best-looking pompoms. I believe you can make your own pompom maker with circular pieces of cardboard, but I haven't tried that method yet. I'll put up a tutorial as soon as I get to try that.

Sunday, January 16, 2011

Plushies: Bunnies + Jack Frost

When I was in grade school, one of our school projects was to make a pink rabbit plush toy using the patterns and materials supplied to us. I was very fascinated with how plushies are made - I've been somewhat collecting them since I was a kid, and making one was an awesome experience.

Ten years later, I found a DIY Bear pack from Clipper. I made a pair of bear plushies, one for me and one for my bf (no pictures, sorry!). And they were poorly made, haha. But I enjoyed making them, and since then, I vowed to improve my skills in plush making.

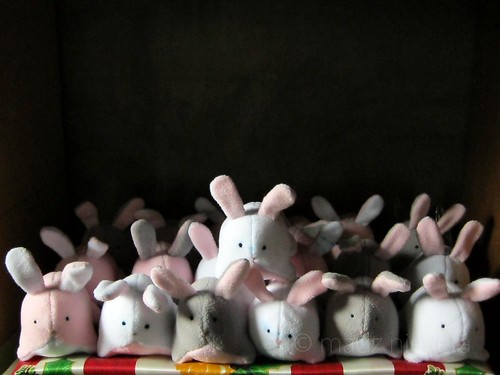
I've been making plushies for a while now. I have yet to take proper pictures of the first few decent ones I made, so here's two of my recent favorites:

bunny army

I made two of these months ago. One to give to a client and the other for myself. My Mom liked how they looked, so she asked me to teach her how to make them to give away for Christmas. I think she made around 40 pieces. She's still making a few more pieces for my grandma (who will give them away as gifts too!).

We think its a perfect gift - its cute, unique, plus 2011 is the year of the Rabbit. Awesome right?


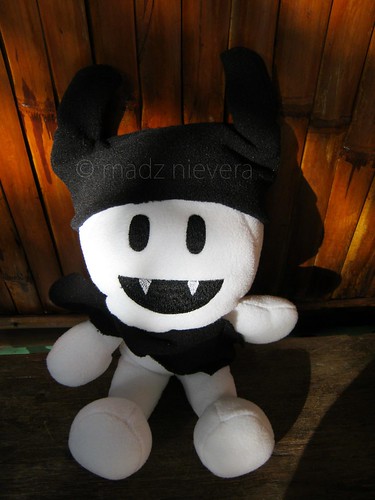
Next is a commission-turned-Christmas gift for a friend. She asked me to make a Jack Frost plushie months ago, but it took me months to finish this. I was still hand sewing stuff back and I had a hard time finding a  good embroidery shop. My usual fabric supplier doesn't have the right fabric color for Jack Frost's outfit too, so meh. In the end, I decided to just give it as a gift.

Jack Frost Persona Custom


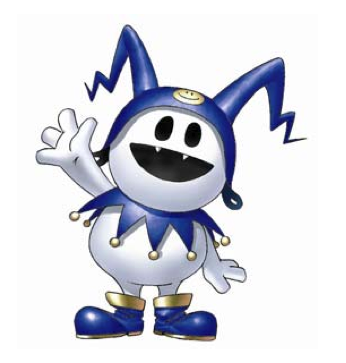
In case you're wondering, here's the original Jack Frost from Persona 3:


I still need more practice in my plushie-making skills, but I think I'm doing ok! More posts soon!

Sunday, January 9, 2011

First Chikara Hats

Whenever I go to anime conventions here in the Philippines, I always see stalls selling chikara hats. I find them really cute. I would've bought one but somehow conventions are always scheduled on the days when I'm broke. Haha. There's a cheaper version of chikara hats though (the ones made with soft felt), but I want the fleece ones since they're soft and are easy to maintain - just throw them in the washing machine and they're good as new.

Being the cheapo that I am, I decided to just make one on my own. I Googled for possible sources locally and by some luck, I found a blogpost about an awesome fabric shop in Divisoria! Days later, I made myself this:

Photobucket

And this,

Photobucket

I'm pretty happy with how they turned out. I used a tutorial on making the hat base from Deviantart (I will look for that tut, I promise!) and did the ear pattern myself. They were my first ones and I'm pretty happy with the results.

Here's a pic of me wearing the bunny hat:

Photobucket


I'm currently accepting commissions on these hats (plus some other hats that I will be blogging about in the next few days). If you're interested, just leave a message here or send me an email at madz.nievera@yahoo.com.

Saturday, January 8, 2011

Hello World!

Hello! Welcome to DIY Lunacy! This will be my little corner here in Blogspot for all my sewing and D.I.Y projects.

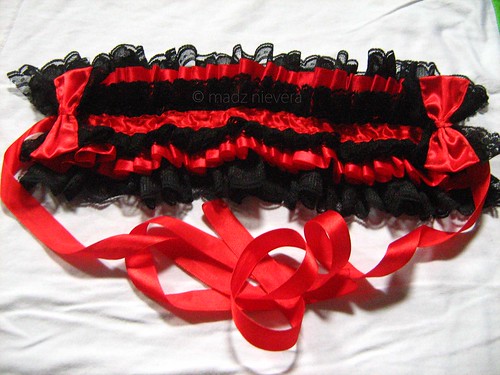
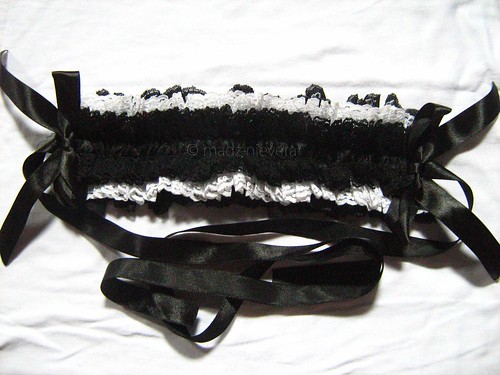
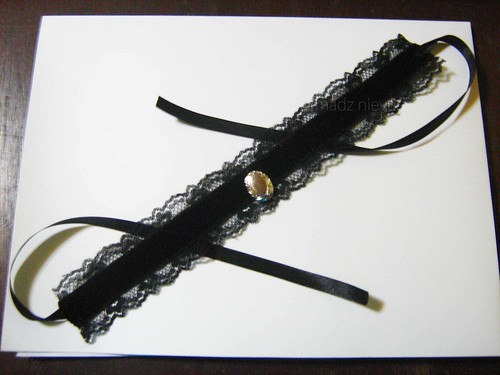
I've been making small accessories and trinkets for a few years now. It started when I was browsing online lolita shops back in college - I wanted to buy a lot of their stuff but my poor wallet cannot buy any of those pretty accessories. So I decided to test my creativity. I scoured for easy online tutorials, picked up a yards of lace and ribbons, and made myself a lolita headpiece.

black and red lolita headpiece

And another,

black and white lolita headpiece

then a choker.

lace choker with locket

A lot of my friends liked my work, some even encouraged me to sell them online (I tried, and failed though. haha).

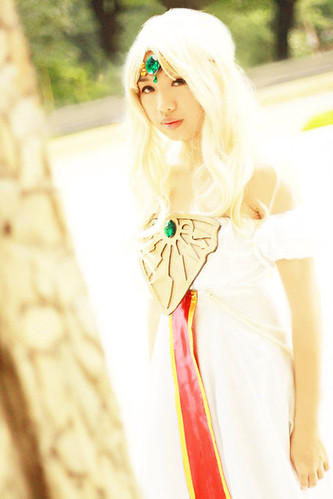
Back then, I was starting to get into cosplaying as well - a pretty pricey hobby for a college student with a meager allowance. With a bit of creativity and keen eye on detail, I started to play with other materials and ended up making a chest plate and crown for my Princess Emeraude costume.

45521_421098210355_587275355_5272174_3355711_n

Right now, I'm mostly making plushies (yes, plushies!) which I will be sharing to you guys very soon! So stay tuned, and thank you for visiting DIY Lunacy!